
I’m excited to share my tips for golden hour photography. The golden hour is a special time when the sun’s light is warm and soft. It’s a great time for photographers.
In this article, I’ll show you how to use golden light photography. You’ll learn about the best time of day for photography. And how to take amazing portraits and landscapes during the golden hour.
Whether you’re a pro or just starting, you’ll learn to use golden hour lighting for photography. You’ll make images that will wow your viewers. Let’s explore the magic of golden hour photography together.
Embracing the Golden Hour Glow
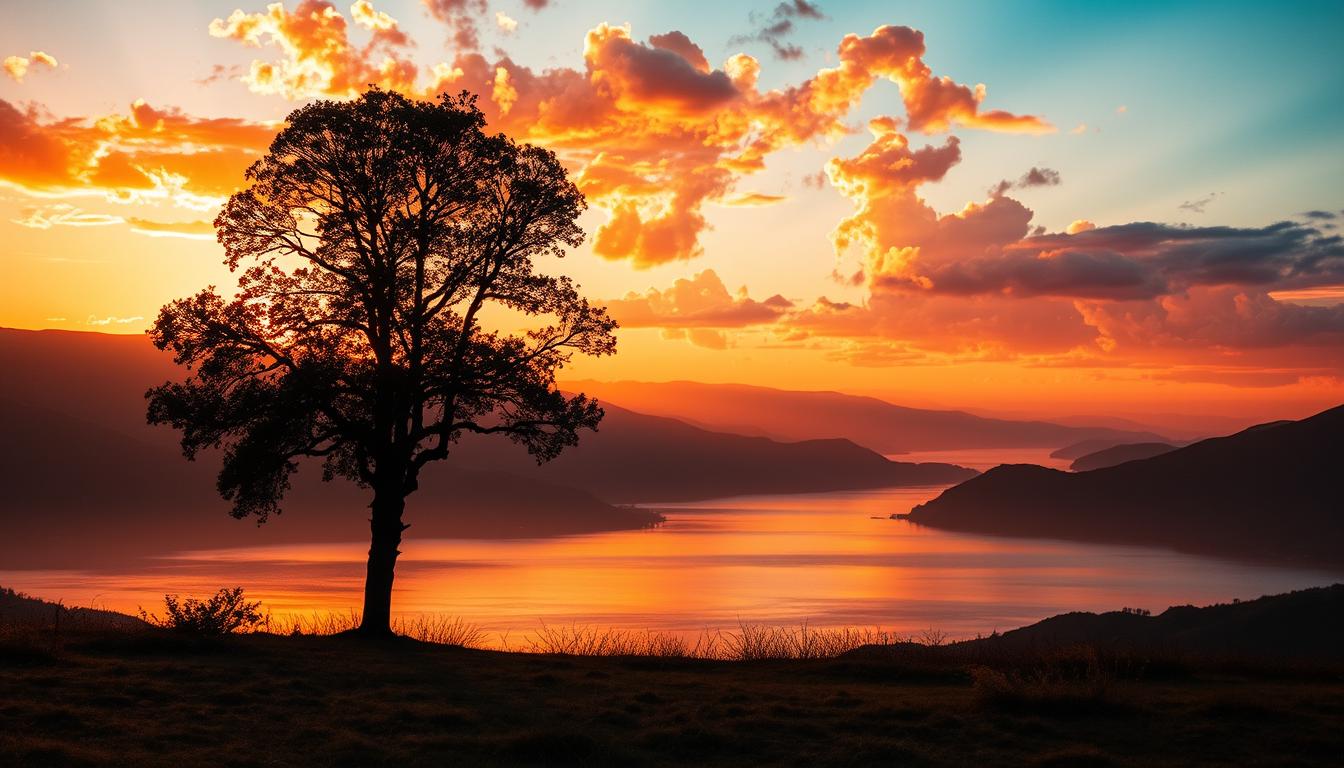
The golden hour, also known as the magic hour, is a special time. It happens right after sunrise or before sunset. During this time, the sun’s light becomes warm and soft, making ordinary scenes look amazing.
As a photographer, knowing about the golden hour can open up new creative doors. It lets you capture the world in a unique way.
Defining the Golden Hour
The golden hour happens when the sun is low in the sky. This creates a warm, soft light over the landscape. It happens about an hour after sunrise and before sunset.
The sun’s rays travel far through the atmosphere during this time. This makes the light soft and gentle. It also adds a golden color to everything it touches.
The Warm, Soft Light of Magic Hour
Photographers love the golden hour for its soft, warm light. This light makes skin tones look better and adds depth to landscapes. It also makes images feel timeless.
This light is often called “golden” or “buttery.” It can turn simple subjects into something truly special.
| Characteristic | Description |
|---|---|
| Color | Warm, golden hues that cast a beautiful glow |
| Intensity | Soft, diffused lighting that is not too harsh or overpowering |
| Directionality | Longer, more pronounced shadows that add depth and dimension |
By understanding the golden hour, you can use its magic in your photos. Whether it’s portraits, landscapes, or more, this light can make your images stand out.
Golden Hour Photography Tips for Stunning Shots

Capturing the perfect golden hour shot is an art. It’s more than just being in the right place at the right time. I’ve learned many techniques to help you get amazing photos during this special time. Here are my top tips for golden hour photography.
Adjust Your Camera Settings
The golden hour’s warm light needs some camera tweaks. Start by lowering your ISO to cut down on noise and grain. Use a wider aperture (f/2.8 to f/5.6) for a shallower depth of field. This will focus on your subject.
Finally, slow down your shutter speed to 1/125 sec or slower. This lets you capture the golden glow fully.
Embrace Backlighting
Backlighting is a key feature of golden hour photos. The sun’s warm light creates beautiful silhouettes or rim lighting. Just watch your exposure to keep your subject well-lit.
| Camera Setting | Recommended Value |
|---|---|
| ISO | 100-400 |
| Aperture | f/2.8 – f/5.6 |
| Shutter Speed | 1/125 sec or slower |
Follow these tips to get stunning, glowing photos. Keep trying new things and don’t be afraid to try new styles. This magical time is perfect for finding your unique style.
Mastering Golden Hour Portrait Photography

The golden hour is a special time for portrait photography. It brings a warm, soft light that flatters subjects. Learning to use this light can make your portraits stunning and captivating.
Posing and Framing During Golden Hour
Proper posing is crucial for golden hour lighting. Have your subjects face the sun for a glowing effect. Try different angles to find the best look. Position them to avoid harsh shadows by using side or back lighting.
For framing, go for a soft, dreamy look. Use wide apertures for a blurred background. Experiment with tight shots or full-body poses to capture the best moment.
- Position subjects to face the sun for a warm, glowing look
- Experiment with angles to find the most flattering lighting
- Use wider apertures to create a soft, dreamy background
- Try a variety of compositions, from tight headshots to full-body shots
Mastering golden hour portrait photography can make your images stand out. With the right techniques, you’ll capture your subjects’ natural beauty in the most flattering way.
Golden Hour Landscape Photography: Capturing Nature’s Beauty

Landscape photography during the golden hour is magical. The warm light makes everything glow golden. This creates perfect chances to show off nature’s beauty. I’ll share tips on finding great spots and using composition to make your photos stand out.
Scouting Golden Hour Locations
Finding the right spot is crucial for golden hour photos. Look for places with clear views, like mountains, lakes, or countryside. Think about how the sun will light up the scene. Some top spots include:
- Iconic national parks like Yosemite, Yellowstone, and Zion
- Serene coastal scenes with crashing waves and rocky shorelines
- Vibrant fields of wildflowers or rolling hills
- Historic landmarks and architectural wonders
Composition Techniques for Golden Hour Landscapes
After finding your spot, focus on composition. Use the light to highlight your subject’s beauty. Try leading lines, the rule of thirds, and focal points. Don’t forget to experiment with different angles. With practice, you’ll capture stunning golden hour photos.
| Tip | Description |
|---|---|
| Utilize Reflections | Look for bodies of water that can act as natural mirrors, doubling the beauty of the golden hour landscape. |
| Highlight Textures | The warm, soft light of the golden hour can accentuate the textures and details in your landscape, from rugged rock formations to delicate flower petals. |
| Capture Silhouettes | Position your subject in front of the setting sun to create dramatic, moody silhouettes that stand out against the golden glow. |
Golden Hour Photography: Tips for Editing and Post-Processing
Capturing stunning golden hour images is just the start. I’ll show you how to edit and post-process your photos. This way, you can make the warm, soft tones pop. You’ll also learn to adjust exposure and contrast and use Lightroom presets to enhance your photos.
Editing golden hour photos is all about keeping the natural beauty of the light. I’ll teach you how to balance the highlights and shadows. This ensures your photos show off the golden glow perfectly. You’ll also learn to tweak colors, saturation, and contrast to make the hues even more vibrant.
I’ll introduce you to Lightroom presets made just for golden hour photos. These presets can help you quickly add a consistent look to your photos. With these tools, you can make your images stand out and share the beauty of the golden hour with everyone.