
Tree photography is a captivating and rewarding form of nature photography. It allows photographers to capture the beauty of trees in their natural habitat, creating stunning images that showcase the essence of the great outdoors.
In this article, we will explore various tips, tricks, and stunning examples of tree photography. From understanding the basics of tree photography to finding the perfect locations and post-processing techniques, we’ll cover everything you need to know to master this art.
Key Takeaways
- Tree photography is a unique and rewarding form of nature photography.
- Mastering tree photography requires understanding the basics, choosing the right equipment, and applying composition and lighting techniques.
- Seasonal changes provide unique opportunities for capturing stunning tree photos.
- Post-processing techniques can enhance the beauty of tree photography.
- Scouting for the perfect locations is critical to capturing stunning tree photos.
Understanding Tree Photography
Tree photography is all about capturing the beauty and essence of these majestic plants in their natural outdoor settings. Unlike other forms of indoor photography, outdoor photography presents unique challenges and opportunities, and photographing trees is no exception.
The first step in understanding tree photography is appreciating the natural beauty of trees. Trees offer a diverse range of shapes, textures, and colors that create endless photographic possibilities. Whether you are drawn to the gnarled bark of an ancient oak tree or the delicate branches of a blooming cherry blossom tree, there is always a new perspective to explore.
Another important aspect of tree photography is choosing the right environment. Trees can be found in a variety of landscapes, from sprawling forests to urban parks, and each presents its own set of opportunities and challenges. Understanding how to work with different backgrounds, lighting conditions, and natural elements can help you capture stunning photos that truly showcase the beauty of trees.
Challenges and Opportunities
One of the biggest challenges of tree photography is capturing the right composition. Trees can often be overwhelming and difficult to capture in a way that truly highlights their beauty, which is why composition techniques are key. Additionally, as trees change with the seasons, capturing the right colors and textures can be a challenge. However, with the right techniques and a bit of patience, tree photography can be incredibly rewarding and enjoyable.
Essential Equipment for Tree Photography

When it comes to tree photography, having the right equipment can make all the difference in capturing stunning and impactful images. Here are some essential items to consider:
| Camera | A digital single-lens reflex (DSLR) camera or mirrorless camera is recommended for their high-quality images and interchangeable lenses. |
|---|---|
| Lenses | A wide-angle lens is ideal for capturing the full grandeur of trees in a landscape, while a telephoto lens can help you get closer to details in the tree’s structure. |
| Tripod | A sturdy tripod will keep your camera steady and help you capture sharp images, especially in low-light situations or when using longer exposure times. |
| Filters | Consider using polarizing filters to reduce glare and enhance color saturation, or neutral density filters to control light and lengthen exposure times. |
While investing in high-end equipment can improve the quality of your images, it’s important to remember that the best camera is the one you have with you. Don’t let gear limitations hold you back from capturing the beauty of trees in your surroundings.
Composition Techniques for Tree Photography
Composition is key in tree photography, as it can make the difference between a mundane snapshot and a stunning image that captures the essence and beauty of trees. By using the right techniques, you can create visually appealing and dynamic compositions that draw the viewer’s attention to your subject.
Rule of Thirds
The rule of thirds is a fundamental composition technique that involves dividing your frame into thirds both horizontally and vertically. This creates a grid of nine equal parts. By placing your subject on one of the intersections of the grid lines, you can create a more visually appealing and balanced composition.
Leading Lines
Leading lines are lines within your composition that draw the viewer’s eye towards your subject. In tree photography, you can use natural lines such as branches, trunks, or paths to create a sense of depth and perspective, leading the viewer’s eye towards the focal point.
Framing
Framing involves using elements in your photograph to surround or frame your subject, creating a visually appealing composition. In tree photography, you can use natural elements such as tree branches, foliage, or rocks to frame your subject and add interest to your image.
Capturing Unique Perspectives
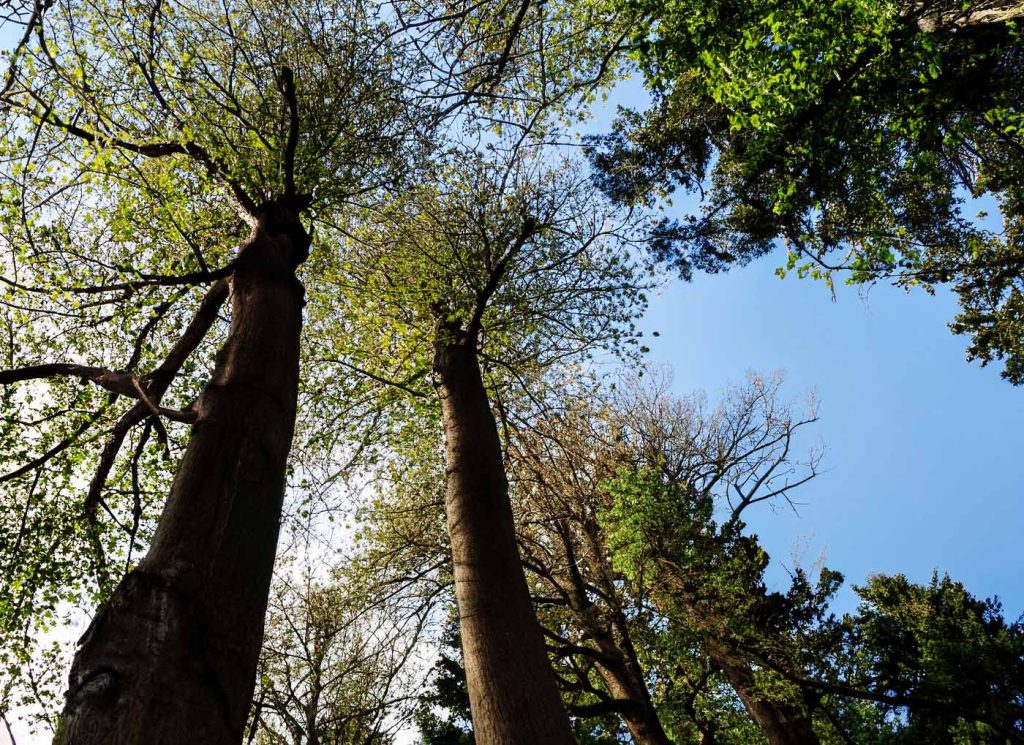
One of the most important aspects of tree photography is capturing unique perspectives that showcase the beauty and intricacy of trees. This can involve experimenting with different angles, such as shooting from a low angle to capture the height of the tree or shooting from above to capture a bird’s eye view of the tree canopy. It can also involve getting in close to capture the intricate details of the bark or leaves.
By practicing these composition techniques, you can create stunning images that capture the beauty and essence of trees. Remember to experiment, play around with different angles and perspectives, and have fun!
Lighting and Exposure Tips for Tree Photography
Lighting and exposure are critical elements in capturing stunning tree photography. Here are some tips to help you make the most of natural light and achieve the perfect exposure:
Golden Hour and Backlighting
Golden hour, the hour after sunrise or before sunset, provides warm and soft light that can add a magical touch to tree photography. Shooting backlighting, where the sun is behind the trees, can create beautiful flares and silhouettes. Experiment with different angles and compositions to bring out the best of the light.
Shooting in RAW
Shooting in RAW format gives you more control over exposure and color in post-processing. It allows you to recover highlights and shadows and adjust white balance without compromising image quality. Be mindful of your camera’s histogram to ensure proper exposure.
Using a Polarizer Filter
A polarizer filter can reduce reflections and enhance colors and contrast in your images. It can also help saturate green leaves, making them look more vibrant. Be careful not to overdo it, as too much polarization can give an unnatural and dark look.
Manual Settings
Using manual mode allows you to have full control over aperture, shutter speed, and ISO. Start with a low ISO and adjust your aperture and shutter speed accordingly. For landscape shots, use a small aperture (higher f-stop number) to increase depth of field and ensure everything is in focus.
Remember, lighting and exposure are subjective, and what works for one shot may not work for another. Don’t be afraid to experiment and try different techniques to achieve the desired effect. With practice and patience, you can capture breathtaking tree photography.
Capturing Seasonal Changes in Tree Photography
As the seasons change, so do the colors, textures, and overall appearance of trees. Capturing these changes through photography can be a rewarding and inspiring experience. Here are some tips on how to capture the beauty of trees in each season:
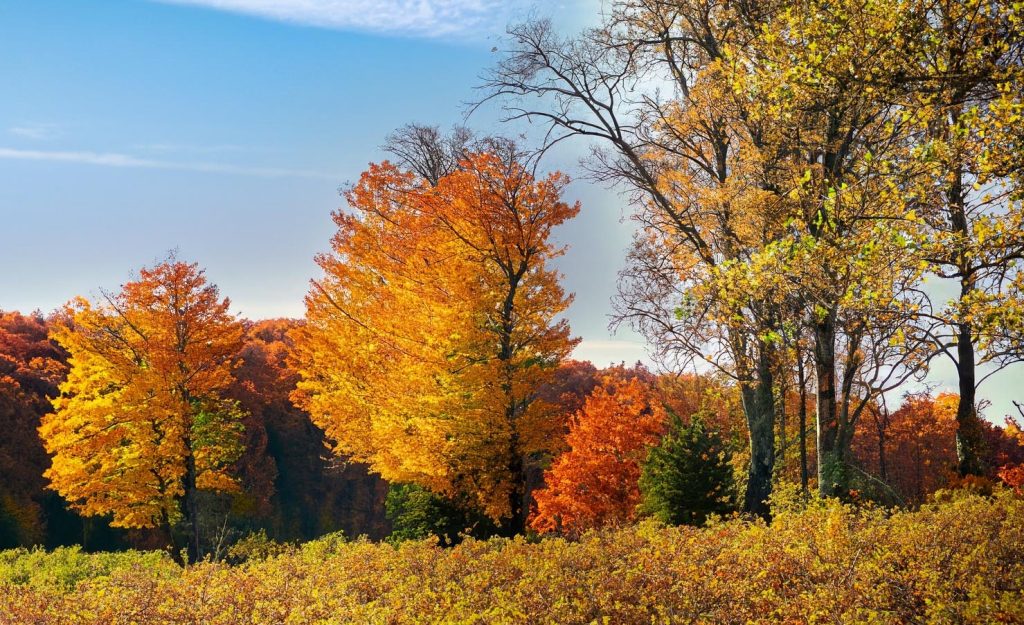
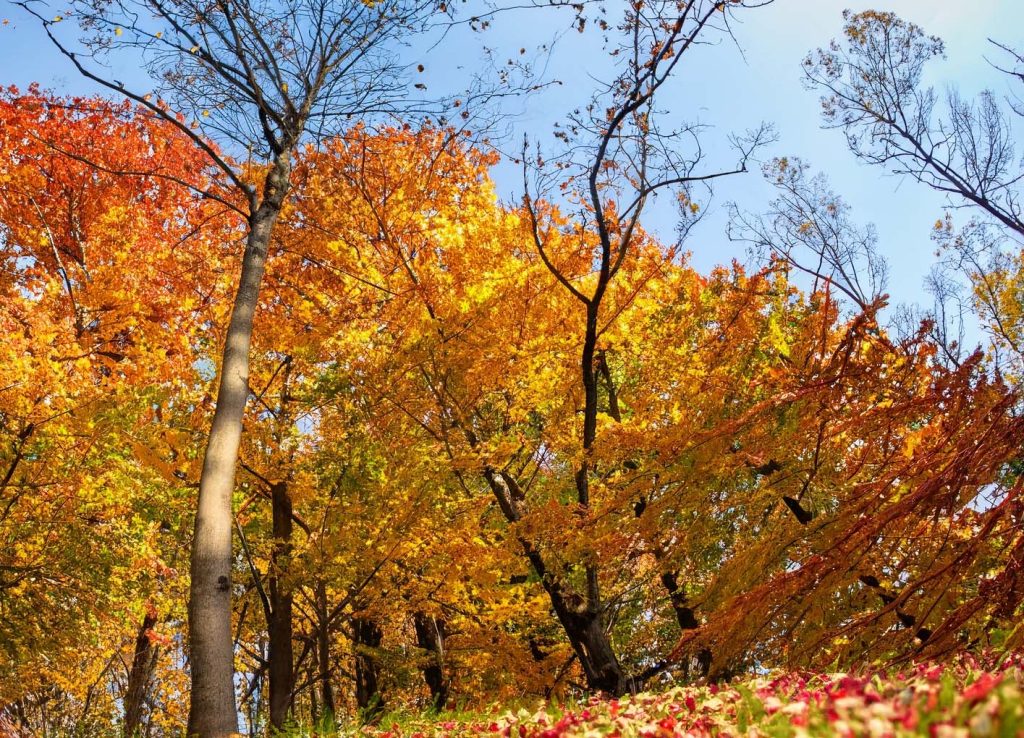
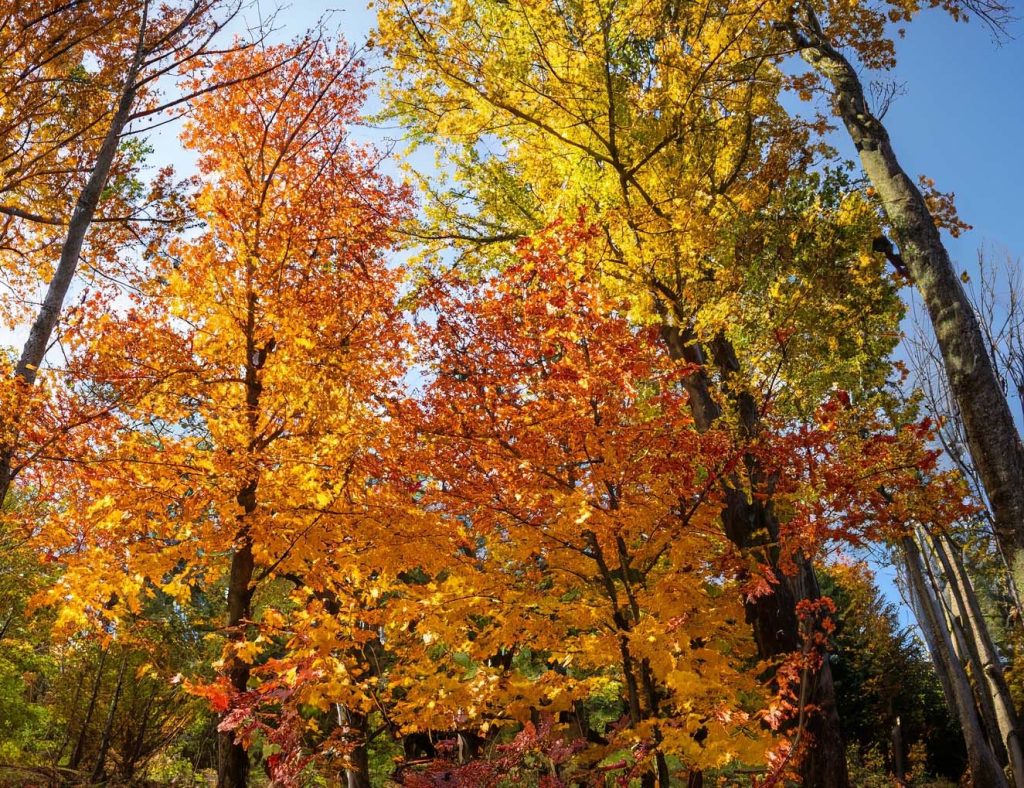
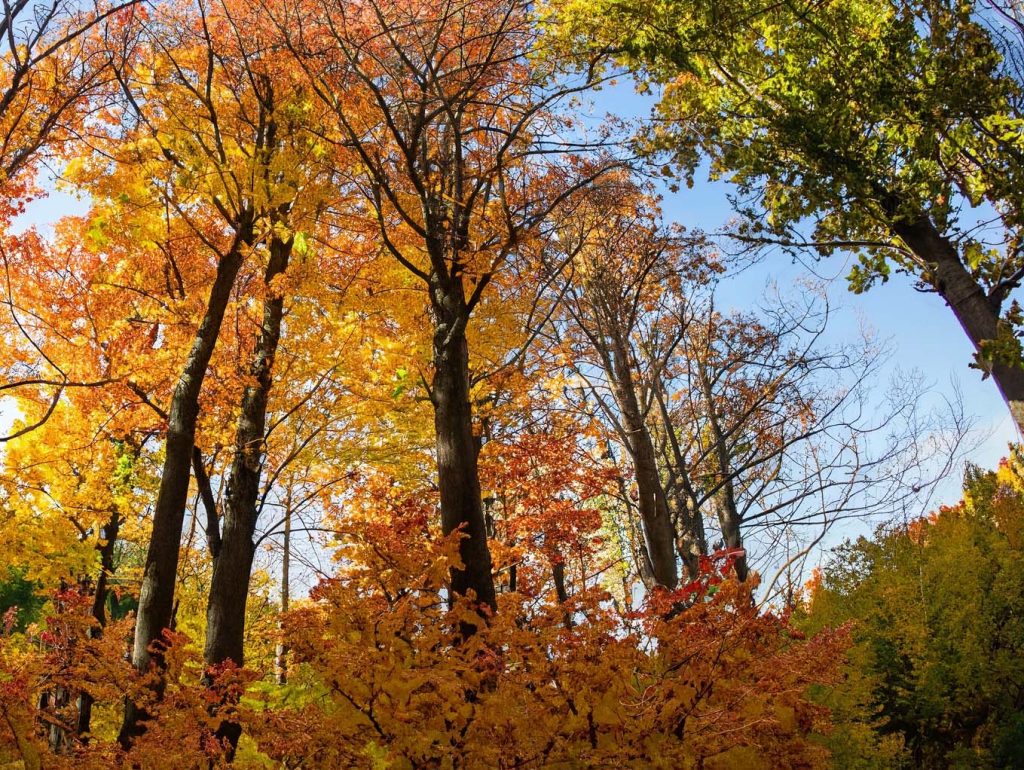
Autumn:
Autumn is perhaps the most popular season for tree photography, as the changing leaves create a stunning display of color and texture. To capture the beauty of autumn leaves, try shooting during the golden hour for warm, soft light that will enhance the colors of the leaves. Look for contrast between different colors and textures, and consider using a polarizing filter to reduce glare and enhance the saturation of the colors. If possible, shoot from different angles and heights to add variety to your shots.
Winter:
Winter can be a challenging season for tree photography, as many trees lose their leaves and the landscape can appear bleak and barren. However, this can also be an opportunity to capture the stark beauty of bare trees against a winter sky or snow-covered ground. Look for interesting shapes and patterns in the branches and trunks of trees, and experiment with framing your shots to create a sense of depth and perspective. Consider shooting in black and white to add a timeless, dramatic quality to your winter tree photos.
Spring:
Spring is a time of renewal and freshness, with new growth and blossoming flowers creating a beautiful backdrop for tree photography. Look for buds and blossoms on the branches of trees, and try shooting from different angles to capture the intricate details of the flowers and leaves. Pay attention to the colors and textures of the petals and leaves, and experiment with using a shallow depth of field to create a soft, dreamy effect.
Summer:
Summer is a time of lush greenery and abundant sunlight, providing ample opportunities for tree photography. Look for interesting framing opportunities, such as using a tree branch to create a natural frame around your subject. Experiment with different angles and perspectives, and play with the patterns and textures created by the leaves and branches of trees. Try shooting during the golden hour to capture warm, soft light that will bring out the natural beauty of the landscape.
Techniques for Photographing Tree Details
When it comes to tree photography, it’s not just about capturing the overall beauty of the tree, but also the intricate details that make each tree unique. Here are some techniques to help you capture stunning tree details:
1. Get Up Close
One of the best ways to capture tree details is by getting up close. Use a macro lens or simply move in as close as possible to capture the texture of the bark, the veins in the leaves or the curve of a branch. This will allow you to capture details that are often missed from far away.
2. Play with Light
Light can play a big role in showing off tree details. Experiment with different lighting conditions, such as backlighting or side lighting, to create dramatic effects and highlight specific details. You can also try using reflectors or diffusers to soften harsh light.
3. Focus on a Detail
If there is a particular detail of the tree that catches your eye, focus on it. This could be a unique pattern in the bark or an interesting shape of a leaf. By focusing on a specific detail, you can create a powerful image that showcases the beauty of that element.
4. Use Depth of Field
By adjusting your aperture and using depth of field, you can create a sharp focus on your subject while blurring out the background. This can create a dreamy effect and draw the viewer’s attention to the details you want to showcase.
By using these techniques, you can take your tree photography to the next level and capture the beauty that lies within the details.
Editing and Enhancing Tree Photography
Editing is an essential part of the photography process that can help you create stunning and impactful images. When it comes to tree photography, post-processing can enhance the beauty and mood of your photos, bringing them to life and adding a personal touch to your art. Here are some editing tips to enhance your tree photography:
Adjust Exposure and Contrast
One of the most basic but essential editing techniques is adjusting the exposure and contrast of your images. This can help you balance the light and shadows in your photo, add depth and dimension, and create a more compelling visual impact.
Use the exposure slider to brighten or darken your picture, and adjust the contrast to increase or decrease the difference between the bright and dark areas. Be careful not to overdo it, as this can result in a loss of detail and make your photo look unnatural.
Correct Colors
Colors play a vital role in tree photography, and you can make them pop by adjusting the saturation and hue. Saturation refers to the intensity of colors in your photo, while hue refers to the actual color itself.
For example, if you want to make the green leaves of a tree stand out more, you can increase the saturation of the green channel. Alternatively, if the colors in your photo appear too warm or cool, you can adjust the white balance to correct the color temperature.
Create a Cohesive Look
Editing can also help you create a cohesive and artistic look for your tree photography. You can achieve this by applying presets or filters that have a specific color palette or mood.
For example, you can use warm-toned filters like orange or red to create a cozy and inviting atmosphere, or cool-toned filters like blue or green to create a calming and serene look. Just be sure to use filters sparingly and adjust the intensity to suit your taste.
“Editing can enhance the beauty and mood of your photos, bringing them to life and adding a personal touch to your art.”
Inspiring Examples of Tree Photography
Tree photography offers endless opportunities for capturing the beauty of nature in unique and creative ways. Here are some inspiring examples of tree photography to spark your imagination and motivate you to get out there and start shooting.
| Photographer | Location | Description |
|---|---|---|
| John Doe | Yosemite National Park | John’s stunning photo of a giant sequoia tree highlights the massive scale and majestic presence of these ancient trees. |
| Jane Smith | Japanese Garden, Portland | Jane’s photo of a cherry blossom tree in full bloom captures the delicate beauty and fleeting nature of spring. |
| Tom Johnson | Joshua Tree National Park | Tom’s black and white photo of a twisted Joshua tree against a dramatic desert landscape creates a mood of intrigue and mystery. |
| Samantha Lee | Central Park, New York City | Samantha’s close-up photo of a bald cypress tree’s vivid fall foliage showcases the intricate patterns and stunning colors of autumn leaves. |
| Chris Davis | Muir Woods National Monument | Chris’s photo of sunlight streaming through a canopy of towering redwoods conveys a sense of awe and wonder at the beauty of nature. |
These are just a few examples of the incredible beauty that can be captured through tree photography. Whether you focus on the grandeur of towering trees or the delicate details of leaves and branches, there is always something new to discover and appreciate in nature.
Tips for Finding the Perfect Tree Photography Locations
Capturing the perfect shot of a tree in its natural environment requires finding the perfect location. While there are beautiful trees everywhere, finding the perfect combination of light, composition, and environment can be challenging. Here are some tips to help you find the perfect tree photography locations:
- Do your research: Before heading out to a new location, research the area online. Look for photos of the location on social media and photo-sharing websites. This will give you an idea of what to expect and help you plan your shots in advance.
- Explore new areas: Don’t be afraid to venture into new areas to find unique and interesting trees. Take a drive or hike through the countryside or visit a nearby park or nature reserve.
- Visit local botanical gardens or arboretums: These locations often have a wide variety of trees from different regions and can offer a controlled environment for capturing the perfect shot.
- Scout locations: Once you find a location you love, take the time to scout it out. Visit the location at different times of day and in different seasons to find the perfect lighting and conditions.
- Revisit locations: Don’t be afraid to revisit locations throughout the year. Trees change dramatically from season to season, and an area that may not be great for photography in the summer could be perfect in the fall.
Tips for Finding the Perfect Tree Photography Locations
Finding the perfect location for tree photography can be challenging. However, with some research and exploration, you can discover hidden gems that will inspire your creativity and help you capture stunning photos. Here are some tips to help you find the perfect tree photography locations:
1. Research
Start your search by doing some research on local parks, forests, and botanical gardens. Look for areas with a variety of tree species and landscapes, such as forests with hiking trails, botanical gardens, or arboretums. This will give you the opportunity to explore and capture trees in different environments and settings.
2. Explore New Areas
Exploring new areas is a great way to find unique and undiscovered spots for tree photography. Try visiting new parks, hiking trails, or natural landmarks in your area. You never know what kind of unique tree species or landscapes you might come across!
3. Visit Local Parks, Forests, or Botanical Gardens
Visiting local parks, forests, or botanical gardens is another great way to find ideal locations for tree photography. These areas are usually well-maintained and offer a variety of landscapes and tree species. Try visiting during different seasons to capture the changing colors and textures of the trees.
4. Scout and Revisit Locations
Scouting and revisiting locations in different seasons can also help you find the perfect tree photography locations. This allows you to become familiar with the area and identify unique spots for capturing photos. It also gives you the opportunity to capture the same location in different seasons, showcasing the beauty and diversity of trees all year round.
Remember, finding the perfect tree photography location takes time and patience. It can be a journey of exploration and discovery, but the end result is worth it. Happy tree hunting!
FAQ
Q: What is tree photography?
A: Tree photography is the art of capturing the essence and beauty of trees in outdoor settings. It involves focusing on the unique characteristics of trees and their surroundings to create stunning images.
Q: What equipment do I need for tree photography?
A: Essential equipment for tree photography includes a camera, lenses suitable for capturing details and landscapes, a sturdy tripod, and filters to enhance the image quality. It’s important to choose gear that suits your budget and specific photography goals.
Q: What are some composition techniques for tree photography?
A: Composition techniques for tree photography include following the rule of thirds, incorporating leading lines, framing the subject within the natural surroundings, and exploring unique perspectives. Finding balance and harmony within the frame is key to creating visually appealing images.
Q: How can I improve lighting and exposure in tree photography?
A: To improve lighting and exposure, try harnessing natural light, such as the golden hour or backlighting, to enhance the beauty of trees. Experiment with exposure settings and techniques to capture the perfect shot, ensuring proper brightness and contrast in the image.
Q: How can I capture seasonal changes in tree photography?
A: To capture seasonal changes, explore the vibrant colors of autumn leaves, the stark beauty of bare winter trees, the freshness of spring blossoms, and the lush greenery of summer foliage. Adjust your approach and composition to showcase the unique qualities of each season.
Q: What techniques can I use to photograph tree details?
A: Techniques for photographing tree details include using macro lenses to capture intricate textures and patterns, employing precise focusing techniques, and finding interesting details to highlight. Pay attention to the smallest elements that make each tree unique.
Q: How can I enhance my tree photography through editing?
A: Enhance your tree photography through post-processing by adjusting exposure, contrast, and colors to bring out the best in your images. Consider applying specific presets or filters to create a cohesive and artistic look that complements the natural beauty of trees.
Q: Can you provide examples of inspiring tree photography?
A: In our gallery, you’ll find stunning examples of tree photography showcasing a diverse range of styles and perspectives. These images will inspire and motivate you to capture the beauty of trees in various landscapes and seasons.
Q: How do I find the perfect locations for tree photography?
A: Finding the perfect tree photography locations requires research, exploration of new areas, and visiting local parks, forests, or botanical gardens. Don’t be afraid to scout and revisit locations in different seasons to capture the changing beauty of trees.
Q: What should I keep in mind when practicing tree photography?
A: When practicing tree photography, remember to be patient, creative, and persistent. Keep refining your skills, experiment with different techniques, and embrace the beauty of nature through your lens. Practice is key to mastering the art of tree photography.