
Have you ever wondered how photographers capture the perfect motion shots? Panning photography is a technique that can help you capture movement in a unique and creative way. Whether you’re capturing action sports, wildlife, or street photography, mastering the art of panning photography can take your images to the next level.
In this article, we’ll guide you through the process of panning photography. We’ll start with the basics, explaining what panning photography is and how to apply the panning technique. We’ll then provide tips and guidance on camera settings, lens selection, and preparation for a panning photography shoot. Finally, we’ll showcase examples of stunning panning photography and provide tips for enhancing your images in post-processing.
Key Takeaways:
- Panning photography is a technique used to capture motion in a creative way.
- Following a moving subject with your camera can create a sense of motion blur in the background.
- Mastering panning camera settings, lens selection, and preparation are crucial for achieving desired results.
- Practice and experimentation are key to mastering the art of panning photography.
Understanding Panning Photography
Panning photography is a technique used to capture motion in images. It involves following a moving subject with the camera while keeping it in focus, resulting in a sharp subject with a blurred background to convey a sense of motion. It is commonly used in sports, wildlife, and action photography to freeze motion and create a dynamic image.
In panning photography, the speed and direction of the camera movement are key to achieving the desired effect. The camera’s shutter speed should be slow enough to blur the background but fast enough to keep the subject sharp. The direction of the camera movement should follow the subject’s motion, allowing the subject to stand out from the background.
How does panning photography work?
The idea behind panning photography is to keep the subject in focus while moving the camera with the subject’s motion. This requires a steady hand and a good understanding of the camera settings. By following the subject’s motion, the background becomes blurred, creating a sense of speed and movement.
The key to capturing the perfect panning shot is timing. You need to start moving the camera before the subject reaches your desired position and continue the movement after it has passed, ensuring you capture a smooth and consistent motion blur.
Mastering Panning Camera Settings
Mastering the right camera settings is crucial to capture stunning panning photography images. Making adjustments to shutter speed, focus mode, and panning direction can make a significant difference in the outcome of your photos. Here are some tips on how to get the ideal camera settings for panning photography:
| Camera Setting | Ideal Value | Explanation |
|---|---|---|
| Shutter speed | 1/30 to 1/60 seconds | Choosing the right shutter speed is key to achieve the desired motion blur effect. Start with a slower shutter speed and adjust accordingly based on the speed of your subject. |
| Focus mode | Continuous autofocus (AF-C) | Using continuous autofocus allows the camera to continuously adjust focus as you track the subject’s movement. |
| Panning direction | Same direction as the subject | Following the subject with the camera in the same direction will create a smoother motion blur effect and keep the subject in focus. |
It’s also important to consider the lighting conditions and adjust the ISO and aperture accordingly. Remember to experiment with various settings to find the perfect combination for your specific panning photography scenario.
Choosing the Right Lens for Panning Photography
Choosing the right lens is essential for achieving optimal results in panning photography. The ideal lens should have a focal length that allows you to capture the subject with enough detail while creating a sense of motion blur in the background.
Wide-angle lenses are generally not recommended for panning photography as they may produce too much distortion and result in a flat, uninteresting image. Instead, consider using a telephoto lens with a focal length between 70-200mm, which will allow you to isolate the subject and blur the background effectively.
In addition, consider using lenses with image stabilization technology, as this can help stabilize your shots and produce sharper images. Some lens manufacturers, such as Canon and Nikon, offer lenses specifically designed for panning photography with features like vibration reduction and focus limiter switches for better results.
Remember that the lens you use ultimately depends on the type of photography you plan to do and the subjects you wish to capture. Take some time to experiment with different lenses and find the one that works best for your needs.
Preparing for Panning Photography
Before heading out to shoot, there are several aspects to consider in order to prepare for a successful panning photography session. By taking the time to prepare, you can minimize potential obstacles and distractions and maximize your chances of capturing stunning motion images.
Scouting locations
One important factor to consider is the location for your panning photography. Look for areas that offer a clear view of the subject’s motion and have a background that will complement and enhance the motion blur effect. Consider the lighting conditions as well, as different times of day and weather conditions can affect the outcome of your images.
Understanding the subject’s motion
It’s essential to understand the subject’s motion in order to effectively track it with your camera. Study the movement beforehand and anticipate the path it will take. This will help you to adjust your camera settings and position yourself accordingly to capture the motion with the desired effect.
Setting up your camera
Before starting your shoot, make sure to set up your camera for optimal results. Use a sturdy tripod to keep your camera stable and avoid camera shake. Adjust the focus mode to continuous autofocus to ensure the subject stays in focus throughout the motion. Set your shutter speed to match the subject’s speed and consider using a continuous shooting mode to capture multiple frames of the motion.
Practice
Remember that practice makes perfect when it comes to panning photography. Take the time to experiment with different camera settings and techniques to find what works best for you. Be patient and persistent, and continue to refine your skills through trial and error.
Perfecting the Panning Technique
The panning technique is essential to capturing amazing motion shots. But mastering it requires practice and patience. Here are some tips to help you perfect the panning motion:
- Start by choosing a slow-moving subject to practice on. A cyclist or a runner can be a great option.
- Set your camera to continuous autofocus mode to track the subject’s motion.
- Slow down your shutter speed to create motion blur in the background. Start with 1/30th of a second and adjust as necessary.
- Stand with your feet shoulder-width apart and shift your weight to your front foot. This will help you move more smoothly as you pan the camera.
- Keep your camera parallel to the ground and follow the subject’s motion with your camera.
- Use your upper body to move the camera, not your arms. This will help you achieve a smoother motion.
- Be patient and take multiple shots. It takes time to get the perfect shot with the right amount of motion blur.
- Avoid using the flash as it can ruin the motion effect you are trying to capture.
- Experiment with different shutter speeds and panning directions to see what works best for your subject.
Remember, practice makes perfect. With these tips, you’ll be able to master the panning technique and capture stunning motion shots.
Examples of Panning Photography
Now that we’ve covered the basics of panning photography, let’s take a look at some examples of how this technique can be used to create stunning images with a sense of motion.
Example 1: Sports Photography
One of the most popular uses for panning photography is in capturing sports action. By following the movement of a player or ball with your camera, you can create an image that conveys a sense of motion and energy.
| Camera Settings: | Shutter Speed: 1/125 sec ISO: 800 Focal Length: 200mm Focus Mode: AI Servo |
|---|---|
| Technique: | Follow the movement of the subject with your camera, keeping your focus point on the player or ball. Use a continuous shooting mode to capture multiple images and increase your chances of getting the perfect shot. |
| Example Image: | 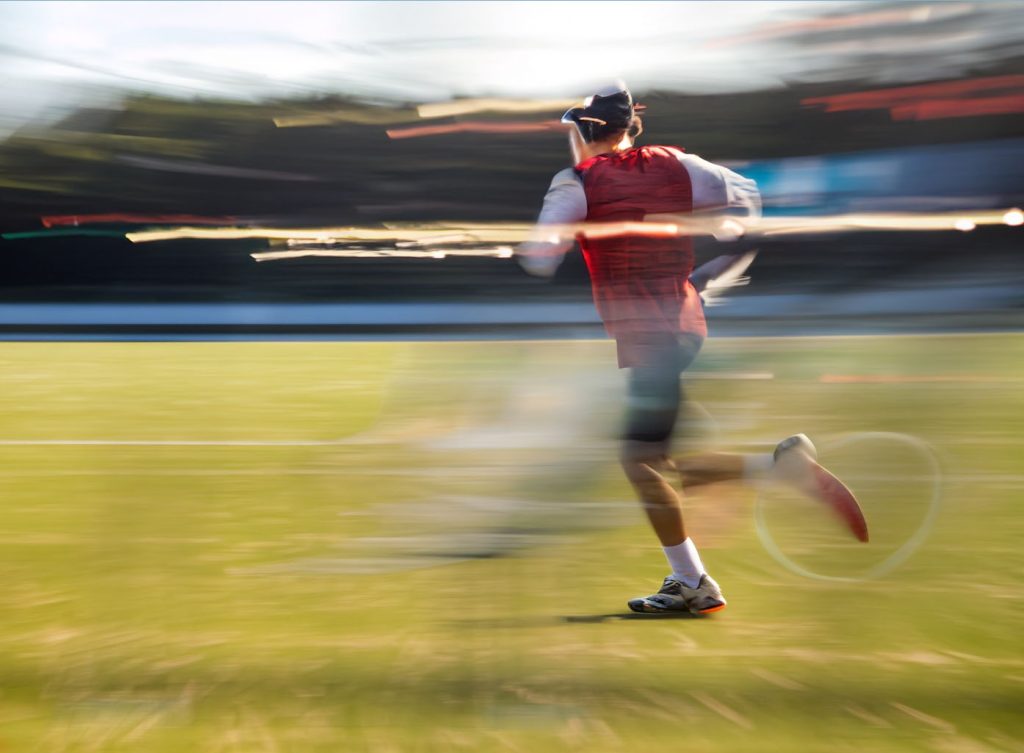 |
Example 2: Wildlife Photography
Panning photography can also be used to capture dramatic images of wildlife in motion. By following the movement of a running or flying animal, you can create an image that shows the animal’s power and grace.
| Camera Settings: | Shutter Speed: 1/500 sec ISO: 400 Focal Length: 300mm Focus Mode: AI Servo |
|---|---|
| Technique: | Find a spot where you can see the animal’s movement coming towards you and follow the animal’s movement with your camera. Use a high shutter speed to freeze the motion of the animal and a wide aperture to create a shallow depth of field that isolates the animal from the background. |
| Example Image: | 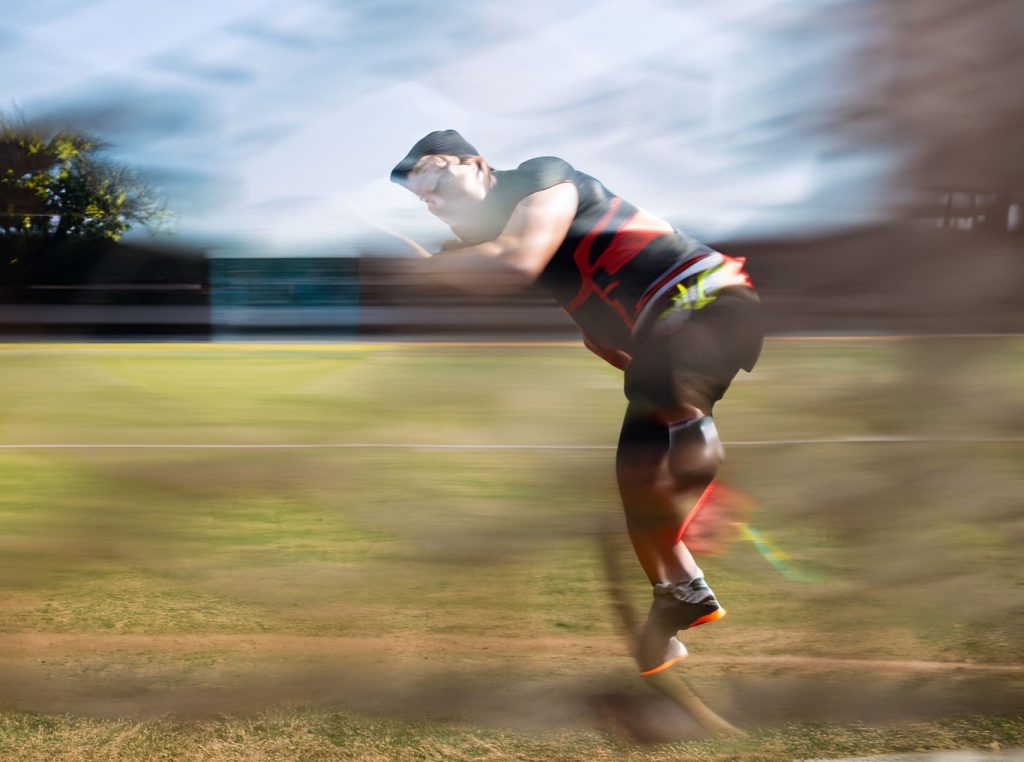 |
Example 3: Automotive Photography
Panning photography is also a popular technique in automotive photography, where it can be used to capture the speed and movement of a car. By following the car’s movement with your camera, you can create an image that conveys a sense of speed and power.
| Camera Settings: | Shutter Speed: 1/160 sec ISO: 100 Focal Length: 100mm Focus Mode: AI Servo |
|---|---|
| Technique: | Position yourself at a spot where the car will be moving from side-to-side in your frame. Follow the car’s movement with your camera and use a slower shutter speed to create motion blur in the background. Use a high aperture to create a deep depth of field that keeps the car in focus. |
| Example Image: | 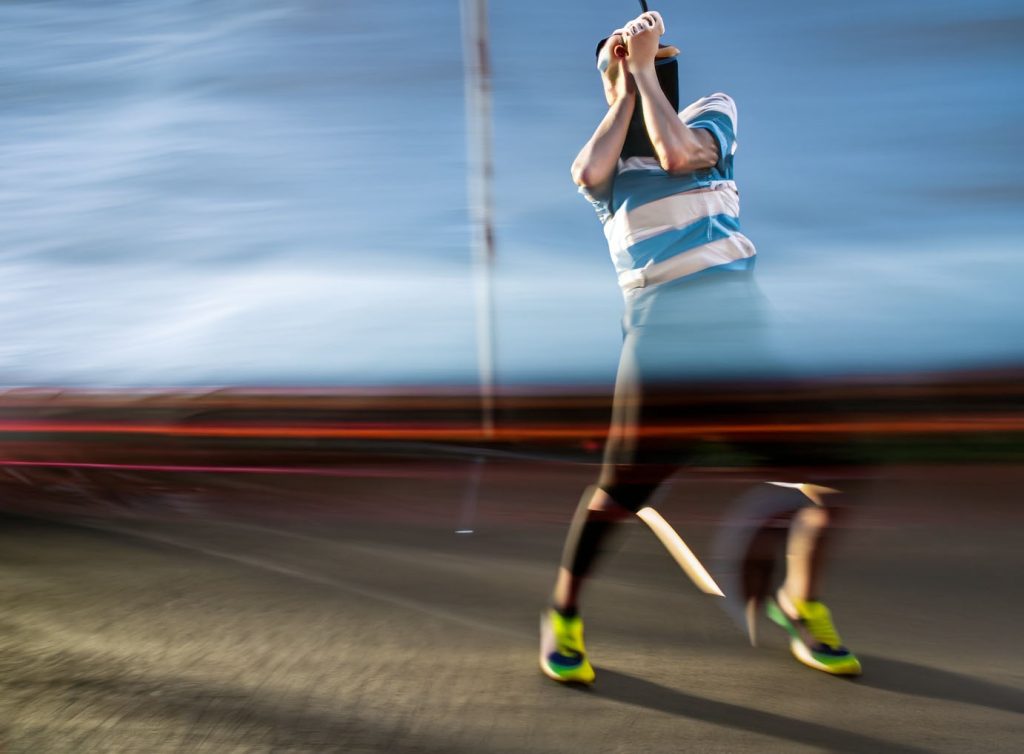 |
As you can see, panning photography is a versatile technique that can be used in a variety of photography genres. With practice and experimentation, you can master this technique and capture stunning images that convey a sense of motion and energy.
Post-Processing Panning Photography
Post-processing is an important step in achieving the perfect panning photograph. Here are some tips to enhance your images:
- Adjust exposure: Use editing software to adjust the exposure of your photograph. This can help to make your subject stand out and create a more dramatic effect.
- Enhance motion blur: Increase the motion blur in the background using motion blur filters or tools like Adobe Photoshop’s Radial Blur. This can emphasize the sense of motion in your photograph.
- Remove distractions: Use the clone stamp or healing brush tool to remove any distracting elements in the background of your photograph.
- Fine-tune the image: Use editing software to make small adjustments to the color, contrast, and saturation of your photograph to achieve the desired effect.
Remember to use post-processing techniques sparingly and with intention. Over-editing can result in an artificial or unrealistic look.
“Post-processing is like making a beautiful meal. You want to enhance the natural flavors, not cover them up with too many spices.” – Anonymous
Conclusion
In conclusion, panning photography can be a challenging yet rewarding technique for capturing motion in images. By mastering the panning technique and choosing the right camera settings and lens, photographers can create stunning images that convey a sense of movement and energy.
However, as with any photographic technique, practice is essential to achieving success. By scouting locations, preparing the camera, and experimenting with different settings and techniques, photographers can refine their skills and capture increasingly compelling motion images.
Keep Exploring
Whether capturing sports events, wildlife, or urban scenes, panning photography offers endless opportunities for creativity and experimentation. By incorporating the tips and techniques covered in this article into their practice, photographers can take their panning photography to the next level and push the boundaries of what is possible.